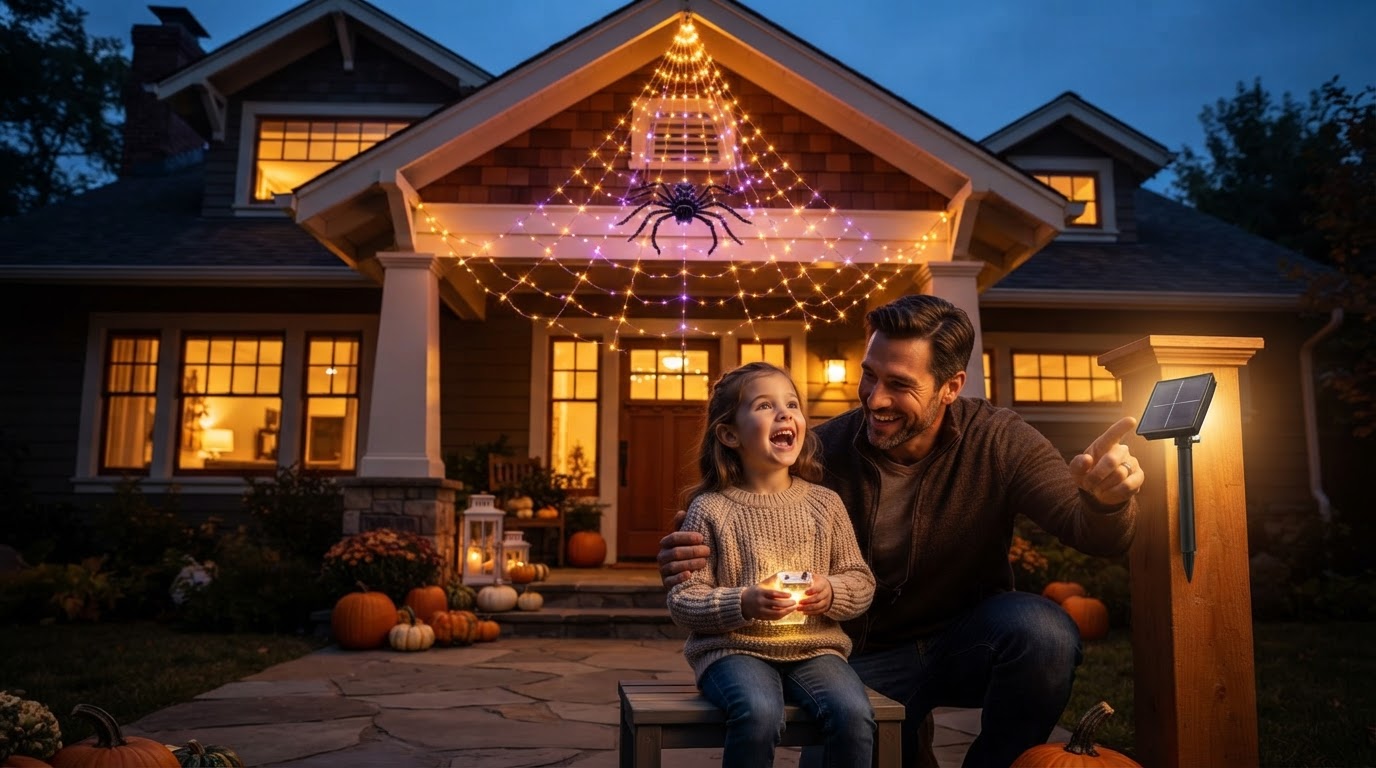
Installing Solar Spider Web for Eaves and Rooflines
 Maya ChenContributing Editor
September 6, 2026. This analysis explores the technical requirements for mounting solar-powered web lighting along residential rooflines. It is intended for homeowners seeking a permanent solution to the seasonal waste of disposable holiday lighting.
The Efficiency Gap in Traditional Eave Lighting
The conventional wisdom says that holiday lighting must be a drain on both the electrical grid and the homeowner's time. For decades, the standard approach to decorating eaves has involved stapling incandescent strands that consume roughly 5 to 10 watts per bulb, leading to significant energy spikes during the fourth quarter. According to data from the U.S. Department of Energy, switching to LED alternatives reduces energy consumption by at least 75%, yet many consumers remain tethered to extension cords that create trip hazards and aesthetic clutter. Here's the part nobody talks about: the labor cost of climbing a ladder every afternoon to manually activate a switch or the failure rate of mechanical timers exposed to autumn moisture. When decorating high-reach areas like eaves, the reliability of the power source is often the first point of failure. Homeowners frequently overlook the voltage drop that occurs when daisy-chaining multiple strands, which results in dimmed output at the end of the line. By shifting the power source from the garage outlet to the roofline itself, the logistical complexity of the installation is halved. This is particularly relevant when integrating outdoor solar spider web decorations that require consistent exposure to function throughout the night. The move toward decentralized, solar-fed lighting isn't just a trend; it is a response to the inherent inefficiency of legacy electrical infrastructure in residential landscaping.
Optimizing Solar Spider Web Placement for Rooflines
Photo by Duy's House of Photo on Pexels
Transitioning to a Solar Spider Web for eaves requires a departure from the "plug and play" mindset. Because these units rely on a dedicated photovoltaic cell, the primary constraint is not the proximity to an outlet, but the solar irradiance available at the roofline. Run the math: a standard solar panel for decorative use needs approximately six hours of direct sunlight to power an LED array for eight hours of darkness. Placing these webs under deep eaves or North-facing gables will result in a 40% to 60% reduction in illumination time. To mitigate this, the solar collector must be positioned on the shingle line or a sun-exposed fascia board, independent of where the web itself hangs. This decoupled design allows the solar spider web net lights to remain in the shadows of the eave—creating the desired spooky aesthetic—while the power source remains in the sun. For homeowners with larger properties, a giant solar spider web for yard installations often complements the eave units, but the eave-mounted versions require specific mechanical fasteners. Unlike ground-staked units, eave webs must contend with wind shear. Using non-penetrating shingle clips or magnetic fascia mounts ensures the web stays taut without compromising the home's water barrier. This becomes critical when using a waterproof solar spider web halloween kit, as the electronics are rated for rain, but the physical tension of the web must be managed to prevent sagging during high-wind events. The integration of a light sensor further automates the process, removing the need for human intervention once the initial mounting is complete.
Technical Checklist for Eave Installation
Photo by Kim Lawrie on Pexels
Before initiating a roofline installation, a structural assessment of the mounting surface is required. The goal is to maximize visibility while minimizing the footprint of the wiring and the solar collector. I'll change my mind when battery density reaches a point where four hours of ambient light can power a 200-LED strand for a full week, but until then, placement is the only variable that matters. Use this framework to evaluate your site:
- Measure the total linear feet of the eave to ensure the web diameter provides 100% coverage without excessive stretching.
- Identify a mounting point for the solar panel that receives at least 6 hours of unobstructed Southern exposure.
- Verify the IP65 or higher rating of the internal controller to ensure it can withstand the runoff from the roof.
- Utilize plastic gutter clips or magnetic hooks to avoid puncturing the fascia or aluminum soffits.
- Test the light-sensing trigger by covering the panel during daylight to confirm the LED array activates as intended.